

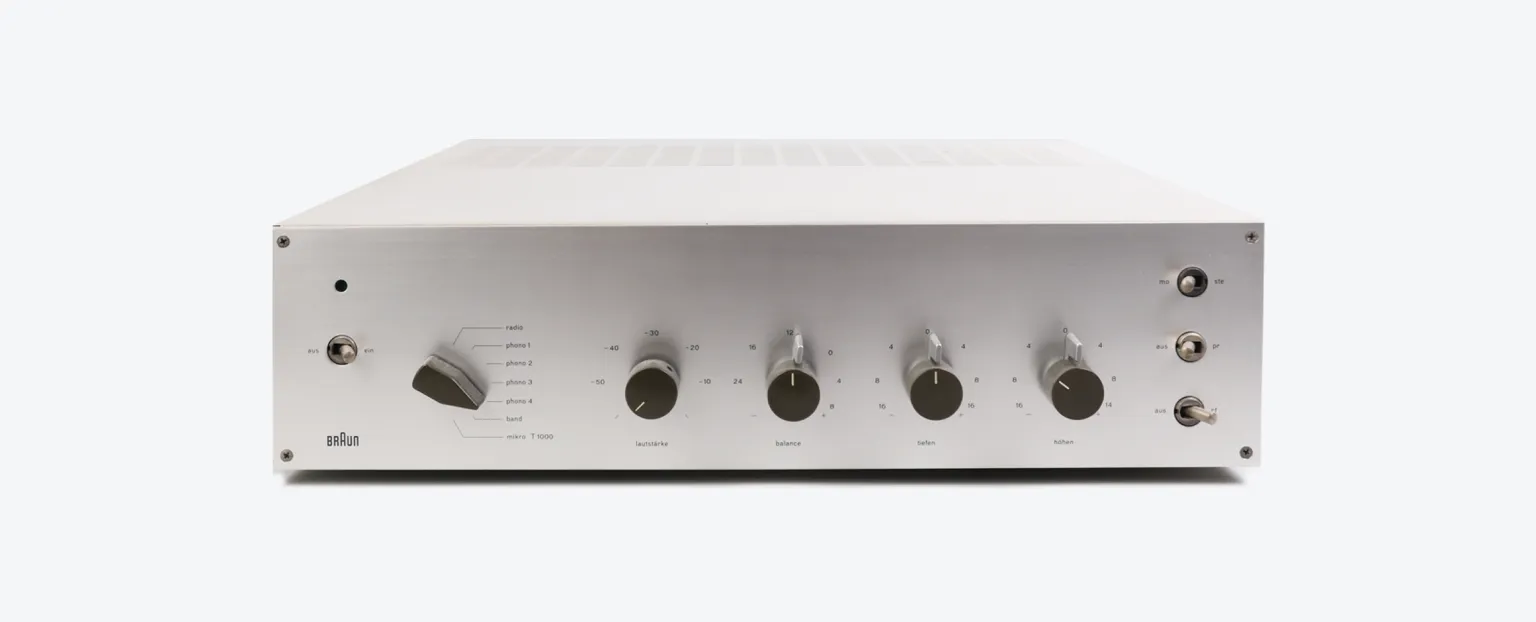
Two years ago, I explored how to rethink climate controls in cars. I was frustrated by carmakers relying too heavily on touch screens and overcomplicating the interface with too many functions.
I focused on the fundamental goal: making passengers comfortable with minimum interactions. I discovered thermal comfort depends on four environmental factors: air temperature, heat radiation, airflow, and humidity. More importantly, staying within a specific range of these factors creates a comfortable environment for most people. This makes it possible to rely heavily on automation.
I created an automated system controlled by a temperature dial. This, in turn, determines the fan speed and seat heating. If the cabin temperature deviates significantly from the set temperature, the system will increase the fan speed and seat heating or cooling accordingly.
This led me to create the first design concept that used a mixed physical/touch interface. While the automated system sets the fan speed and seat heating, the driver can always override this.
For the second iteration, I decided to remove the seat heating from the automated system as this is a highly personal feature that is better controlled individually. I also introduced a dial design that would sit on top of the touch display so the touch-sensitive center is used to temporarily override the automated system:
While the concept showed promise, it remained theoretical. So, it was time to pick it back up and build a prototype.
Finding the right hardware
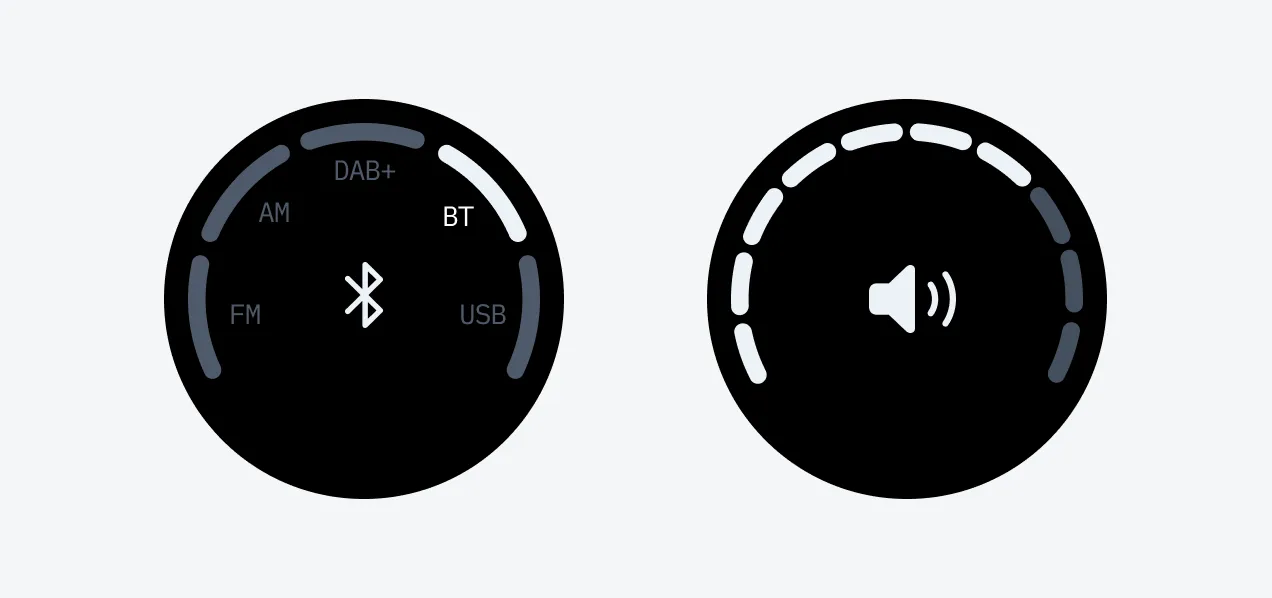
My initial plan was to mount a dial onto a touch display. Having tested various implementations, I discovered this technology is not good enough. Registering accurate touch events is tricky, and it renders the space around the dial useless as it has to remain empty to prevent accidental touch interactions when rotating the dial. So, instead of bringing a dial to the display, I decided to bring the display to the dial.
That’s when I came across Scott Bezek’s open-source Smart Knob project. He used a brushless DC motor to emulate an analog dial. By playing with the force and resistance of the motor, it’s possible to create fake detents that are totally controlled by software. This means you can simulate different types of haptic feedback, like different detent strengths and hard stops. Additionally, it has a vibration motor that simulates a button press when pushing down on the dial. Combined with a small display, it creates a fully customizable physical control that can simulate almost any type of interaction with a physical dial.
After gaining significant attention in the maker community, Seedlabs turned it into a pre-fabricated development kit. Included are a couple of examples that show off the capability of the device.
It was the perfect starting point for my exploration, so I ordered one and got to work.
Experimentation
A rotary dial like this may look simple from a design perspective. But there is so much to explore! The fact that you can control everything about the software and haptic feedback is a fantastic opportunity to figure out what types of interactions are possible.
When you see any physical control, you automatically get certain expectations from its physical properties like size, shape, and weight. These ‘affordances,’ as they are called, tell you how the object can be used. For example, a round dial communicates that it can be rotated. A big dial communicates that it controls important functions requiring more precision, whereas a small one controls fewer, less essential functions. Similarly, signifiers, such as labels, can explain something about the function of the control, the number of steps, or the state.
Similarly, the haptic feedback from rotating the dial is a communication layer. When a dial controls different settings, such as the media source, it often has hard detents to indicate the significance of the change. The detents are smaller if the dial controls different values within a single feature, such as volume.
I did a couple of experiments to better understand these properties of rotary dials. For example, I tried implementing a simple volume control with three different haptic patterns:
1. Smooth, linear resistance This felt lifeless and artificial, even though it was technically the most precise.
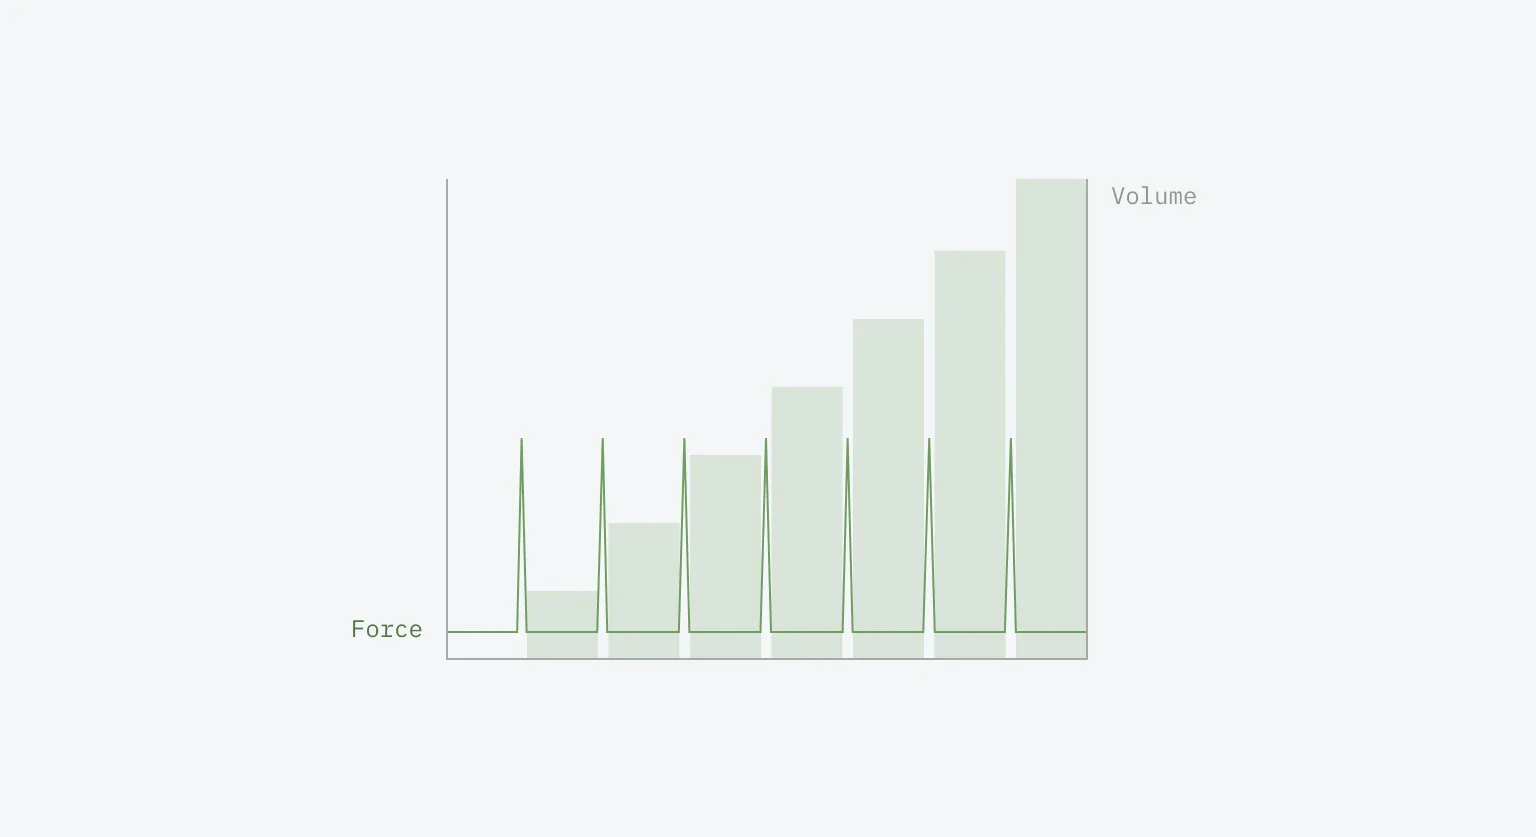
2. Subtle detents at regular intervals This is the most common way to handle a control like volume; therefore, it felt the most natural.
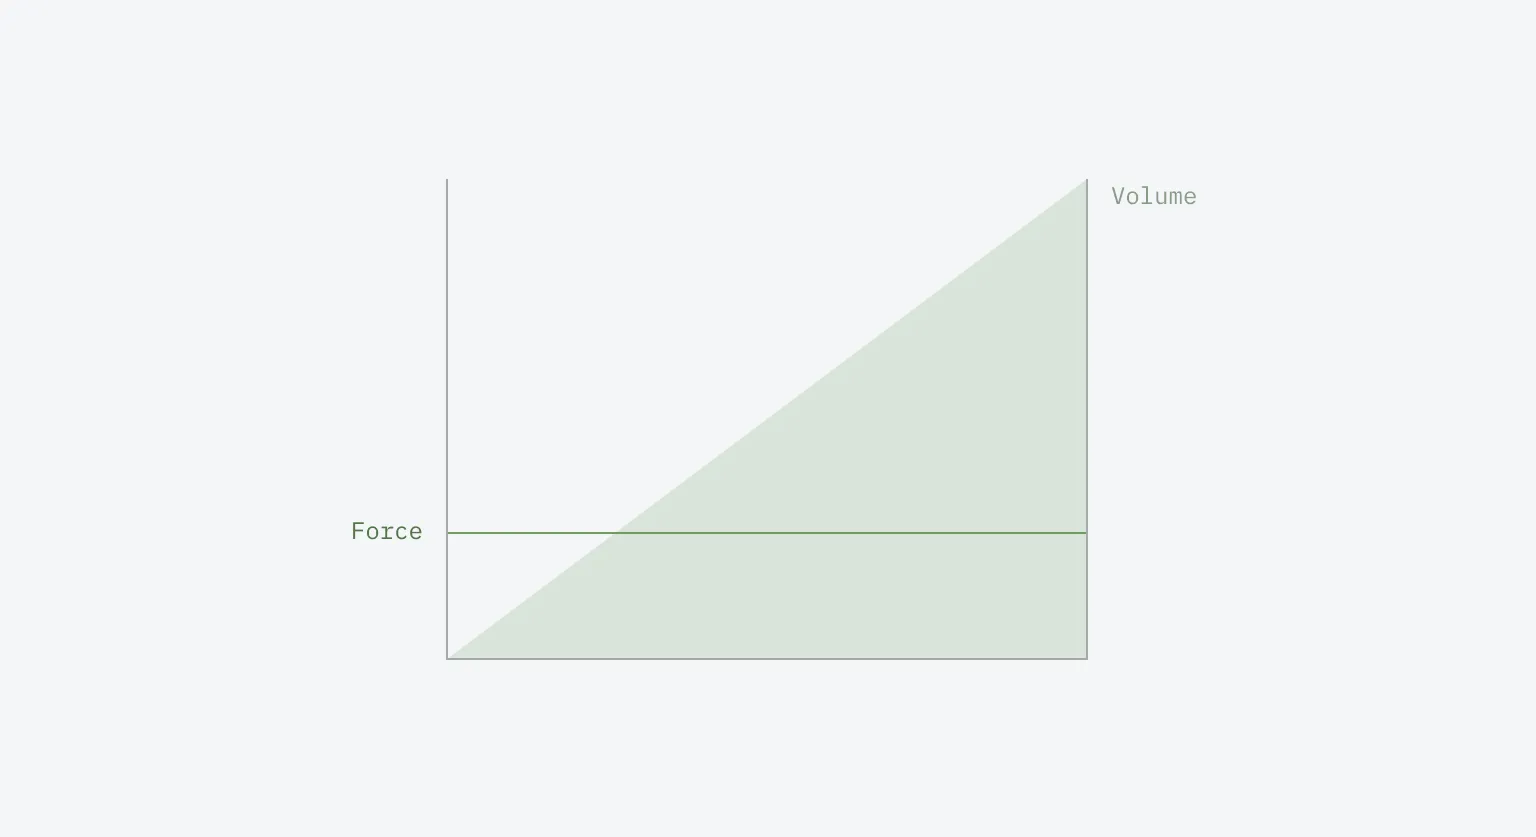
3. Dynamic resistance that increased in force with volume level Increasing the resistance proportionally to the volume is an interesting concept that is hard to create with an analog dial. It, therefore, feels unusual, especially for a typical control like volume, but it has potential in other application areas.
Based on my experiments, I created a set of guidelines for designing haptic interfaces with rotary inputs:
Design Guidelines for Haptic Interfaces
Keep haptic patterns consistent across similar operations
Much like a door handle should communicate whether to pull or push a door, the dial sets expectations in our minds of how it feels and how heavy the rotation is. The haptic feedback should match that, and the interaction between similar operations should not be mixed. If volume and fan speed have the same type of value range, do not change the interaction pattern. Don’t use a continuous rotation for one and a stepped rotation for the other.
Allow for both precise and rapid adjustments
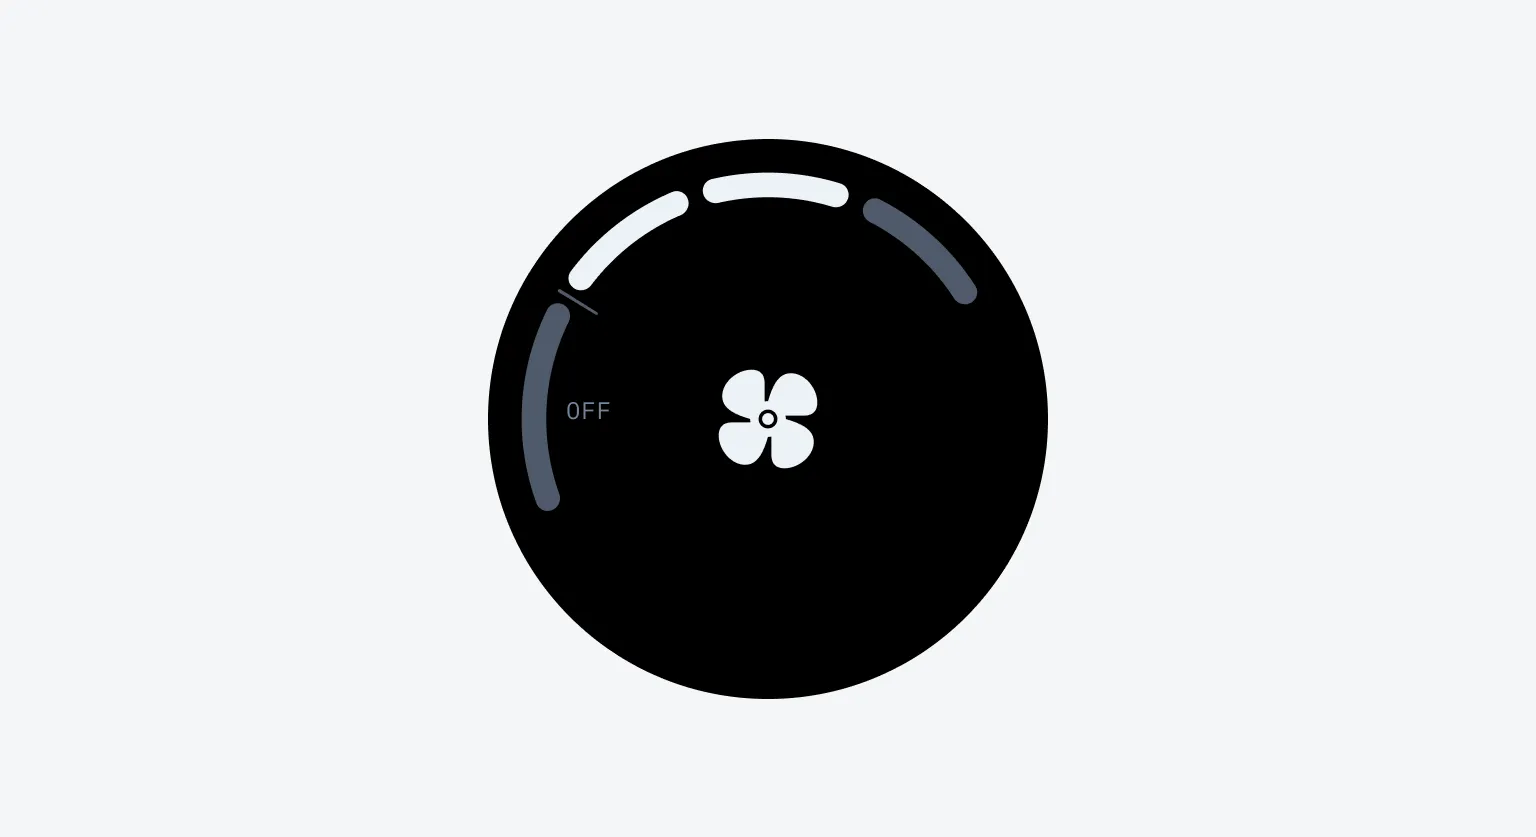
Certain features, like volume, allow two different behaviors. During regular usage, passengers adjust the volume in small steps to match their preferences. However, on occasion, the passengers need to mute volume quickly. Both options should be possible. Another type of function where this is common is one with an off state. In the example below, the first position of the dial is the off state. Rotating the dial fully to the left instinctively means turning the function off.
Synchronize physical and visual feedback
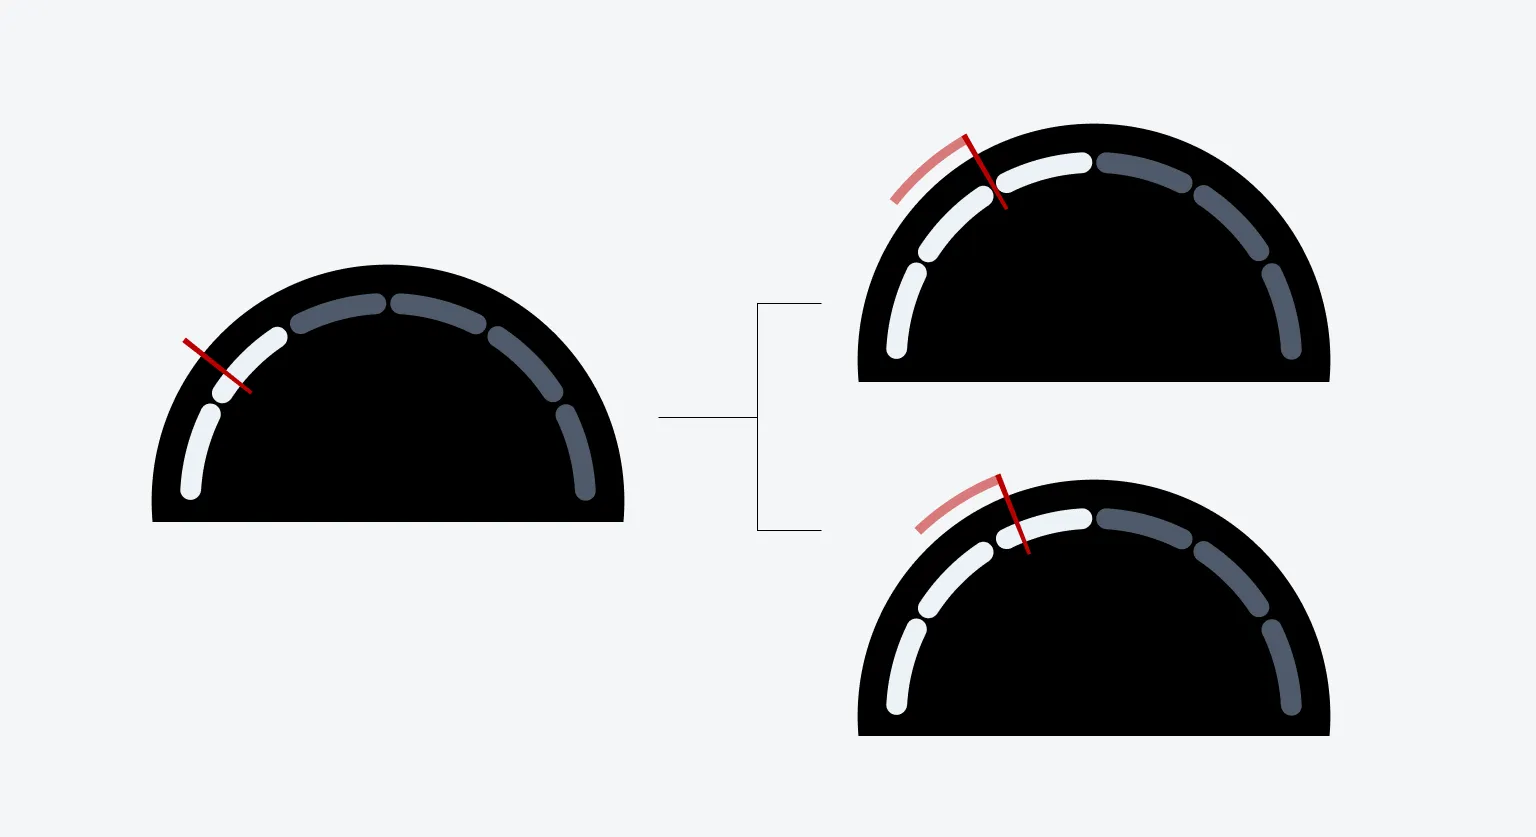
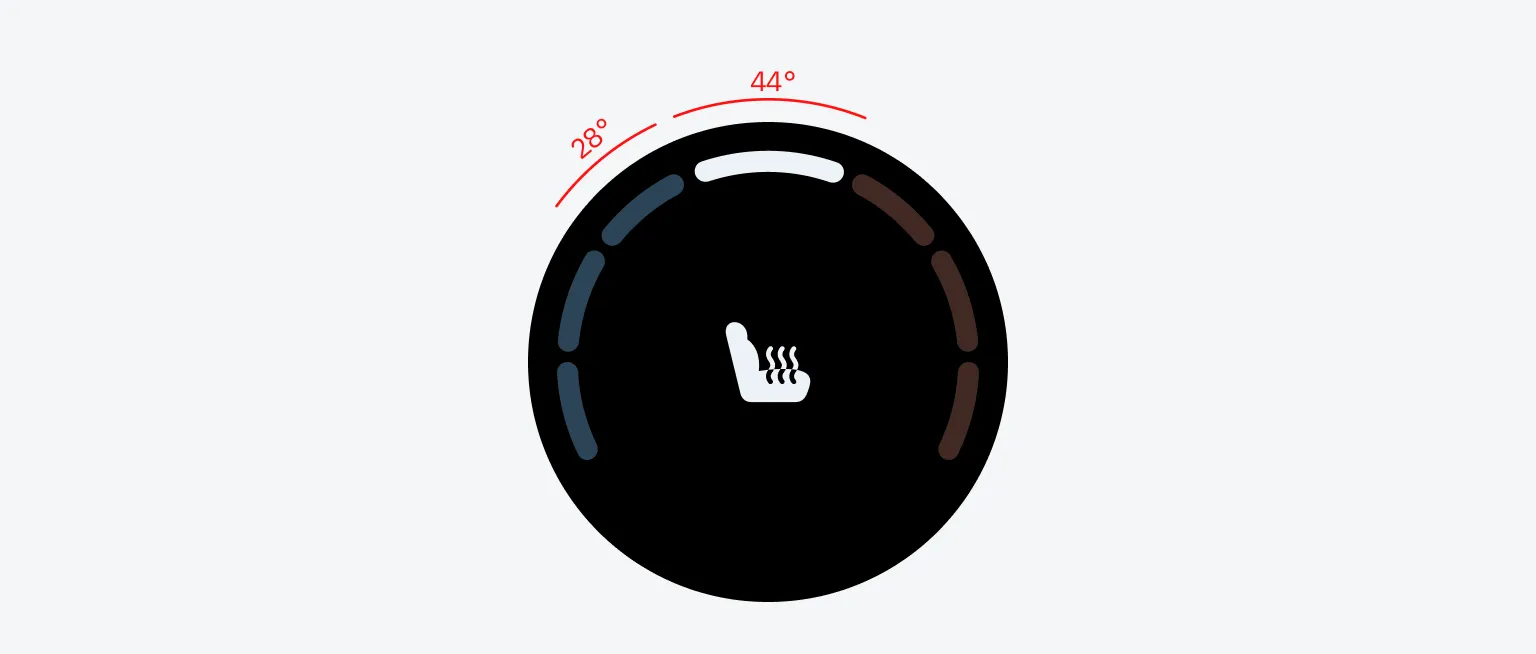
Matching the digital interface to the physical rotation of the dial is crucial. This comes down to two things. The first is matching the total rotation of the dial to the interface. If the dial can rotate 270°, the interface must also be 270°. The second is to match the detent’s position to the interface’s position. This is trickier than it seems. For example, if the total range of the dial is 180° and there are 6 detents, each detent is 30°. You would expect the UI to update between each detent. However, this leads to the UI feeling out of sync. Therefore, it’s better to delay updating the UI. In my experiments, the UI updates when the dial is 20% past the detent, giving a more natural feeling.
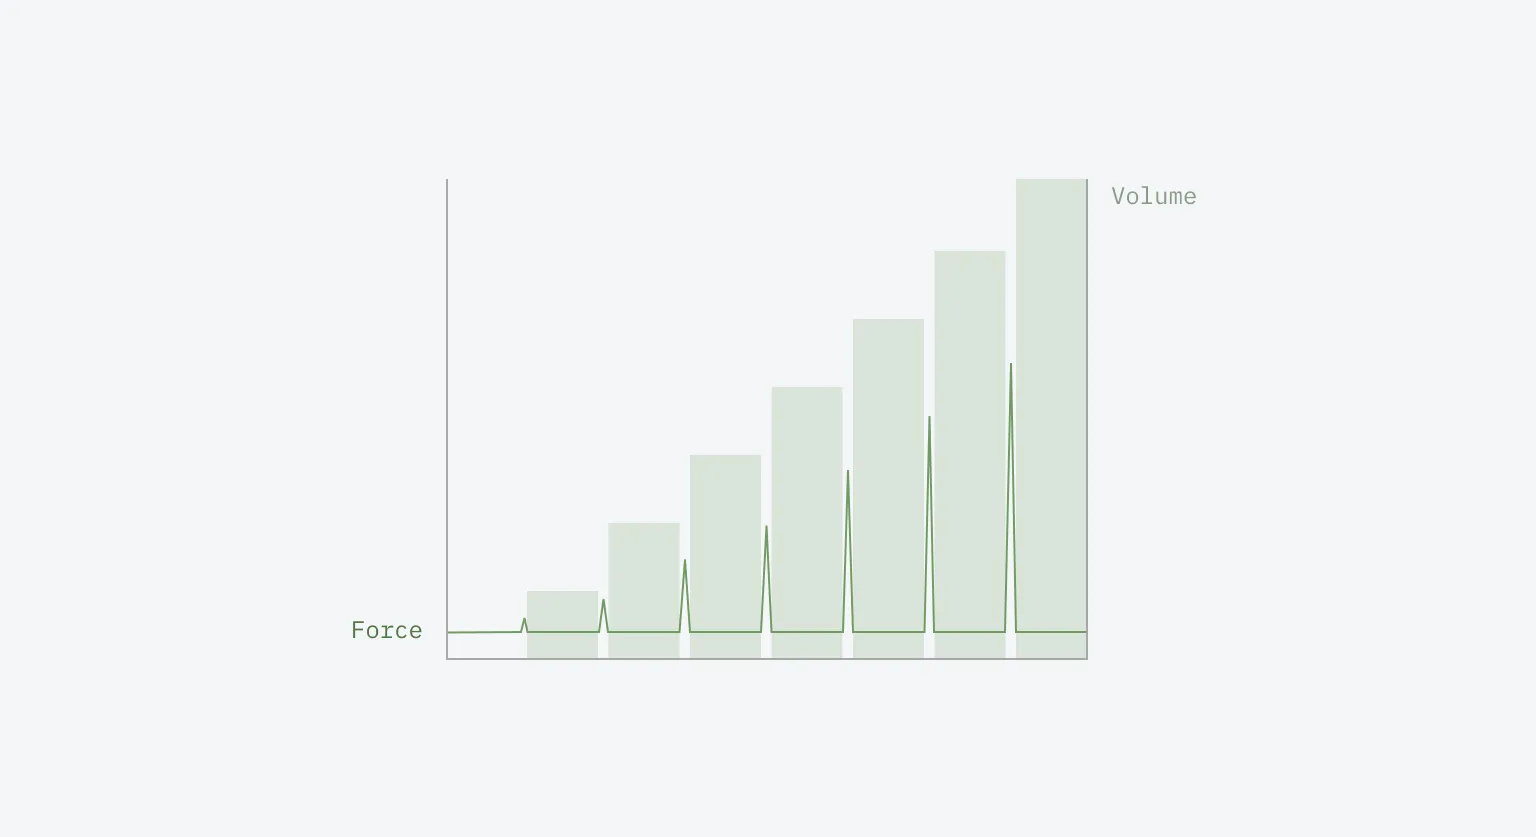
Scale detent strength inversely with value range
The detents should be subtle if the data ranges from [0,99]. If the range is small, like [0,3], detents have to be stronger to clearly communicate the position of the dial.
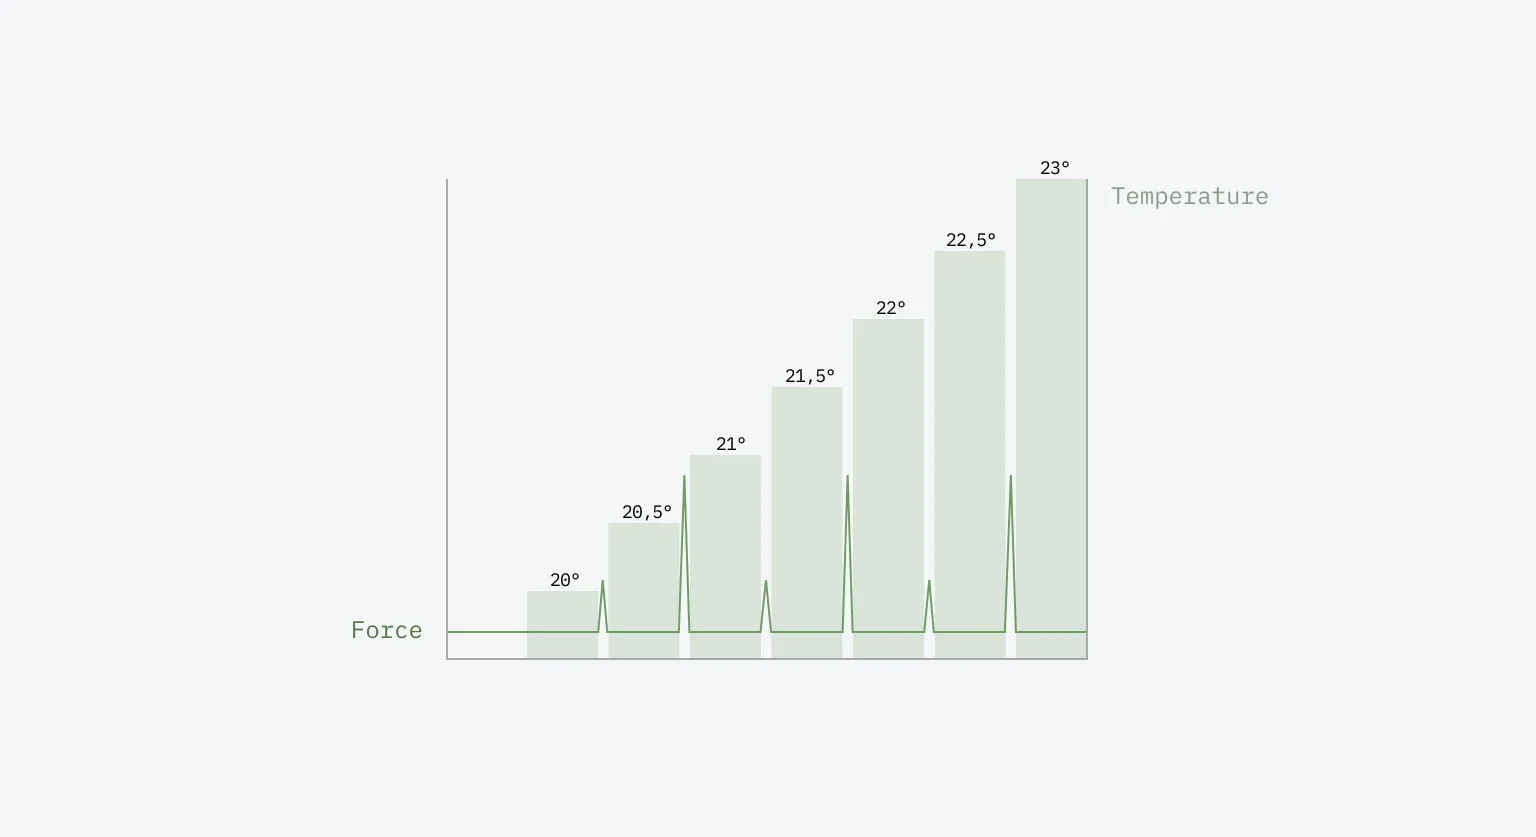
Place stronger detents at significant values
To allow for finer communication, it can help to differentiate between major and minor values through detent strength. It adds a new layer of communication to the haptic feedback that is easy to understand. For example, temperature values with a decimal value.
Vary resistance and step size to indicate extreme values
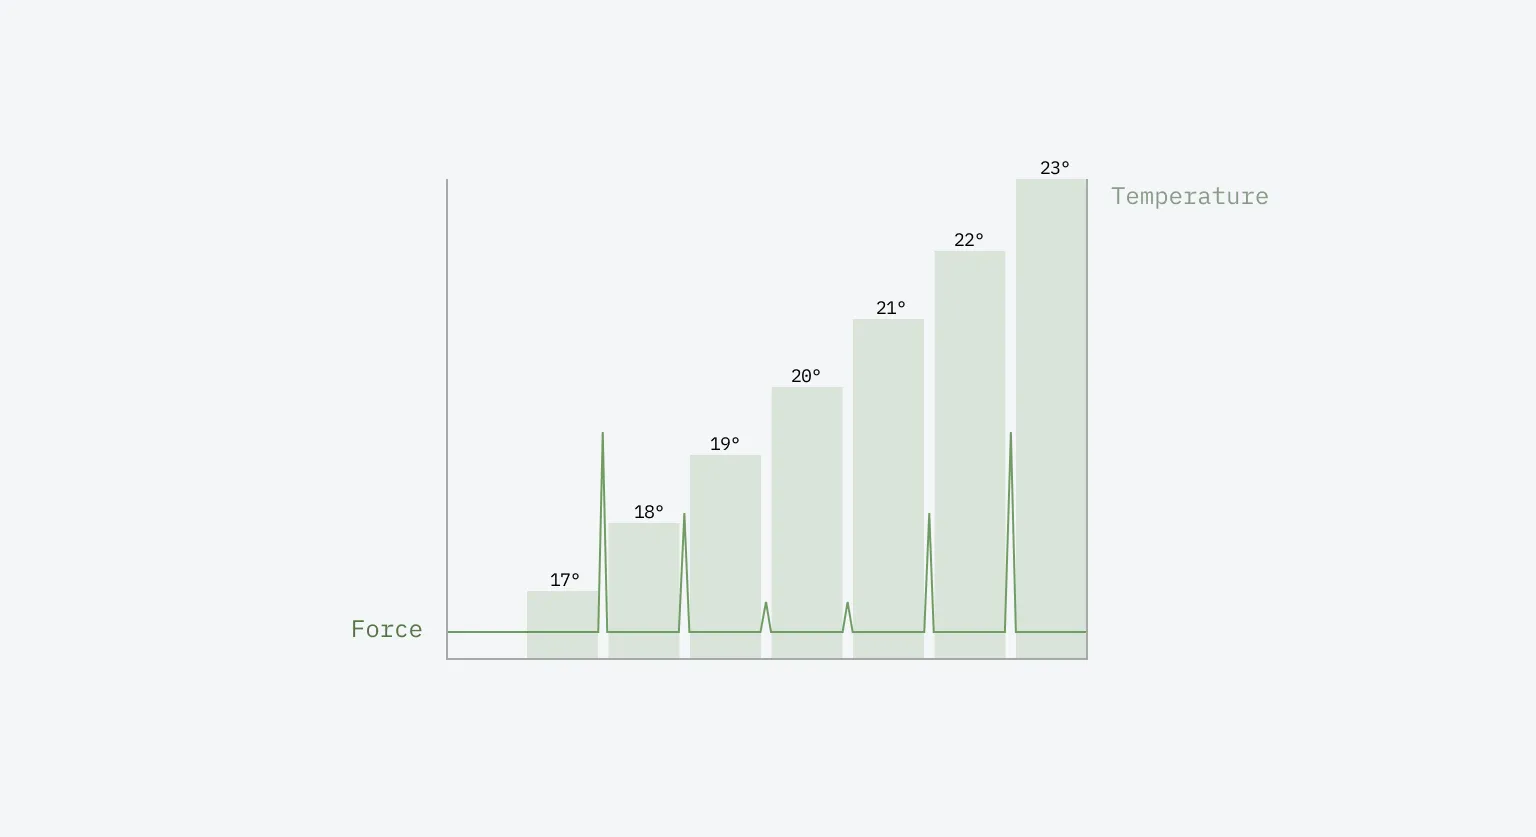
Another way to add a layer of communication to the haptic feedback is by increasing the force for extreme values. This indicates that the consequences of this action are more intense than those of normal values. For example, in an automated climate mode, setting a temperature that varies significantly from the current cabin temperature will result in the system taking more serious action to achieve this temperature.
This is especially helpful in situations where the extreme values are dynamic. In my automated climate system, the cabin temperature isn’t always the same; therefore, the same set temperature can have different consequences depending on how close the cabin temperature is to the set temperature.
Another way of achieving this is by increasing the number of degrees for an important step. For example, an ‘off’ mode can be larger than the steps for the on mode.
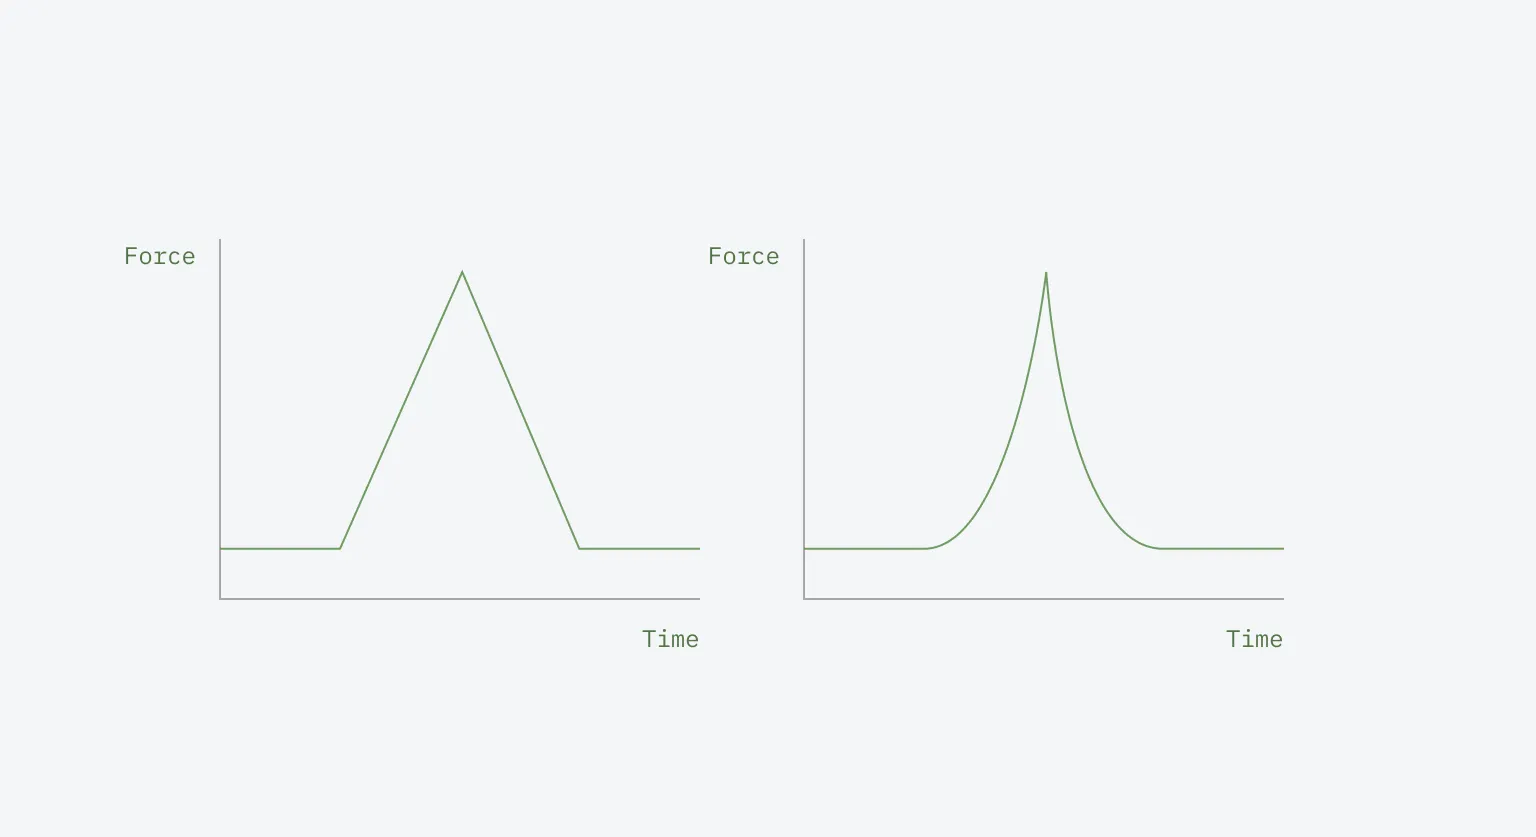
Add subtle “preview” resistance before state changes
The curve of the force should not be linear but logarithmic. This way, resistance increases the closer you move to the detent. This makes it clear when precisely the step is triggered, and you can feel it when you get close to the next step.
Turning the concept into reality
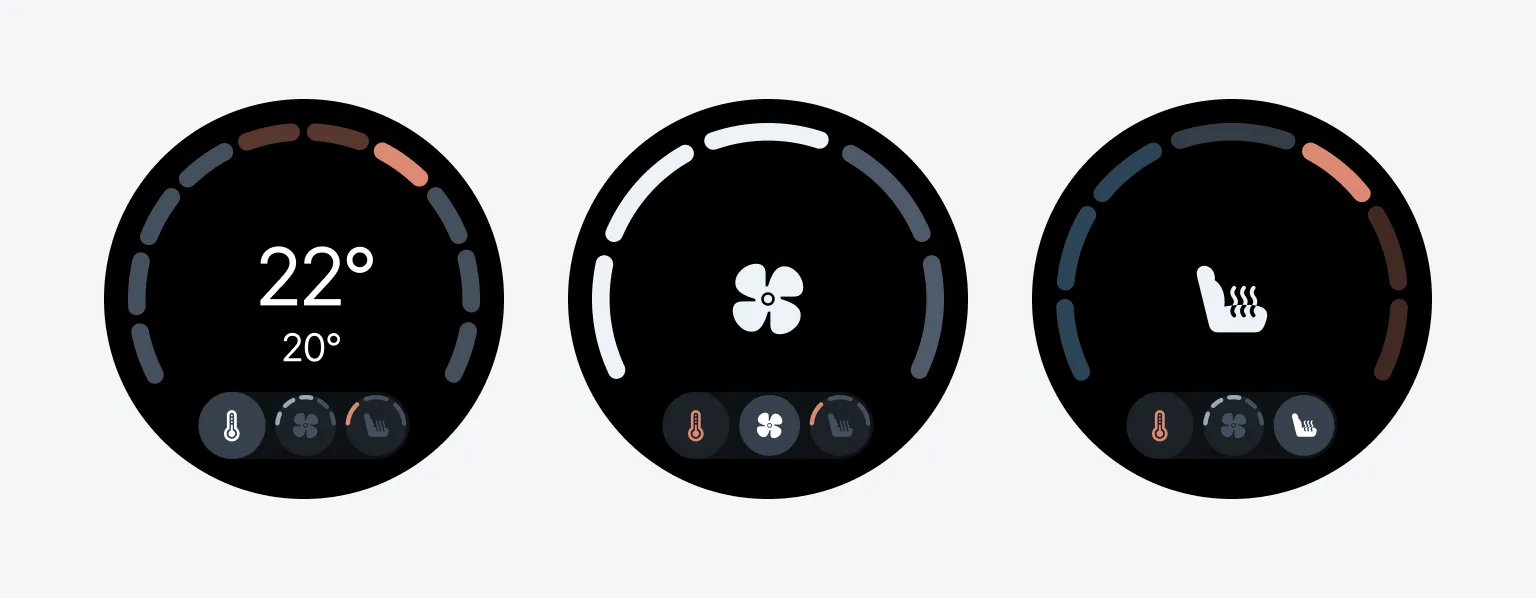
After establishing the design principles, I implemented the concepts I created previously. I created a fake automated system with all three functions: temperature, fan speed, and seat heating. In my previous article, I concluded that adding seat heating to the automated system wasn’t suitable as it is a highly personal function. This remains true, but I wanted to include it in the dial to explore whether controlling three different functions through one dial is possible.
For temperature control, I added progressive haptic resistance to communicate the magnitude of changes. The further you adjust from the current temperature, the more resistance you feel, as setting a significantly higher temperature will increase the fan speed and seat heating.
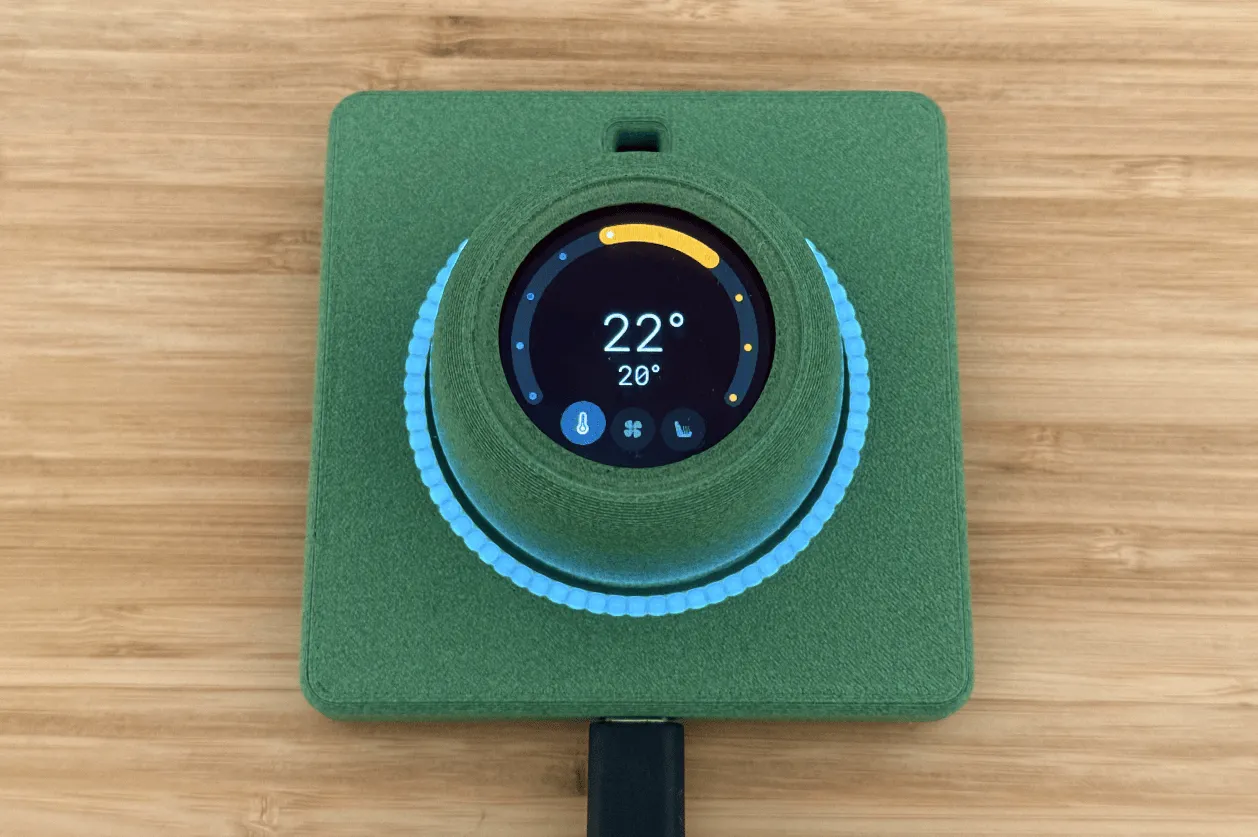
Fan speed and seat heating received the same haptic profiles - fan speed uses five clear steps, whereas seat heating uses 4, with the first one being the “off” position with stronger feedback. By pressing down on the dial, you can cycle through the functions.
I highlight the active function through a small paginator at the bottom of the display. However, it should also communicate the relationship between the functions in the automated system. When fan speed and seat heating change after setting a temperature, the driver should be aware of that without having to cycle through the functions. I explored this further in Figma:
Being able to modify the angle, force, and detents of the dial through software is amazing and gave me a better understanding of the effect of different kinds of haptic feedback on usability. It’s fun and insightful to update the different values until they are perfect.
Conclusion
Showing three different data types in one dial is possible but definitely the maximum. When adding a fourth function, keeping track of your position in the interface without looking down becomes too difficult. One of the main challenges is the small display that needs to show a lot of information. Since I created an automated system in which all three data types are linked, it is challenging to communicate this link through a tiny display, especially if it’s intended to be used while driving. It becomes a lot easier if there are only two functions — temperature and fan speed. This makes more sense conceptually, and there is now enough space in the interface to clearly communicate the status of the automated system.
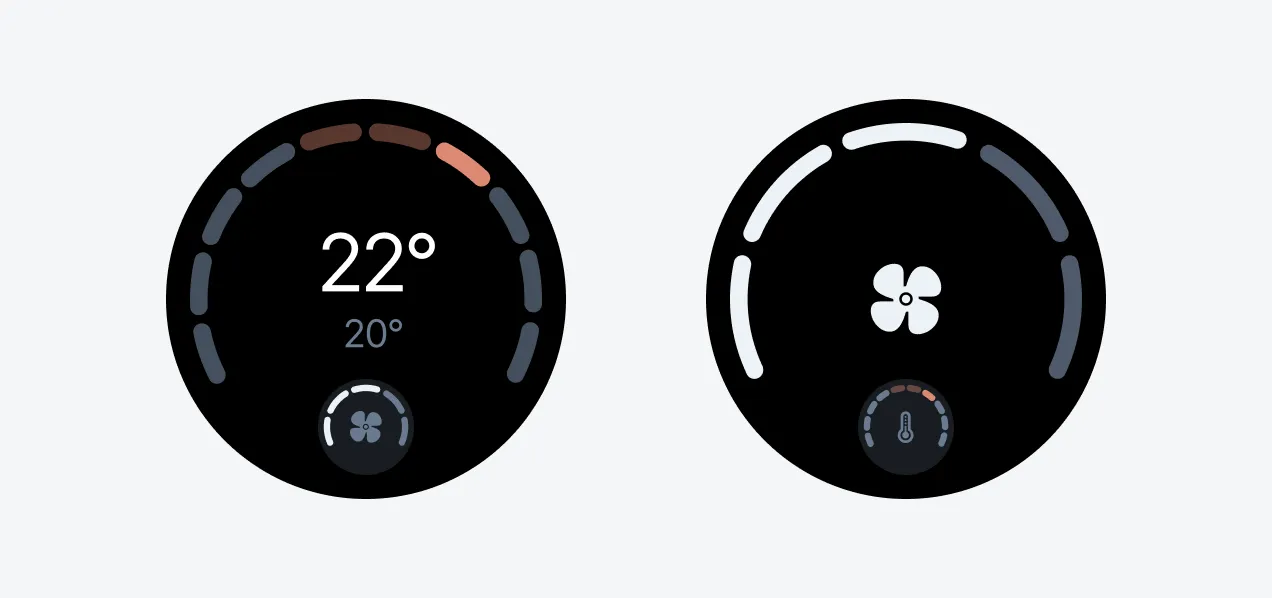
This setup is also my recommendation after all my experiments. A rotary dial with two functions is easy to understand and operate. Relying on an automated system keeps the number of interactions to a minimum, allowing the driver to override it easily if needed. Ideally, seat heating is also a physical control that enables passengers to set their preferred setting with one button press instead of cycling through the strength with multiple presses.
Example of implementations today
I want to highlight two carmakers with similar interesting solutions. The first is Jaguar, who had a clever solution for a dial with three functions by adding a depth dimension.
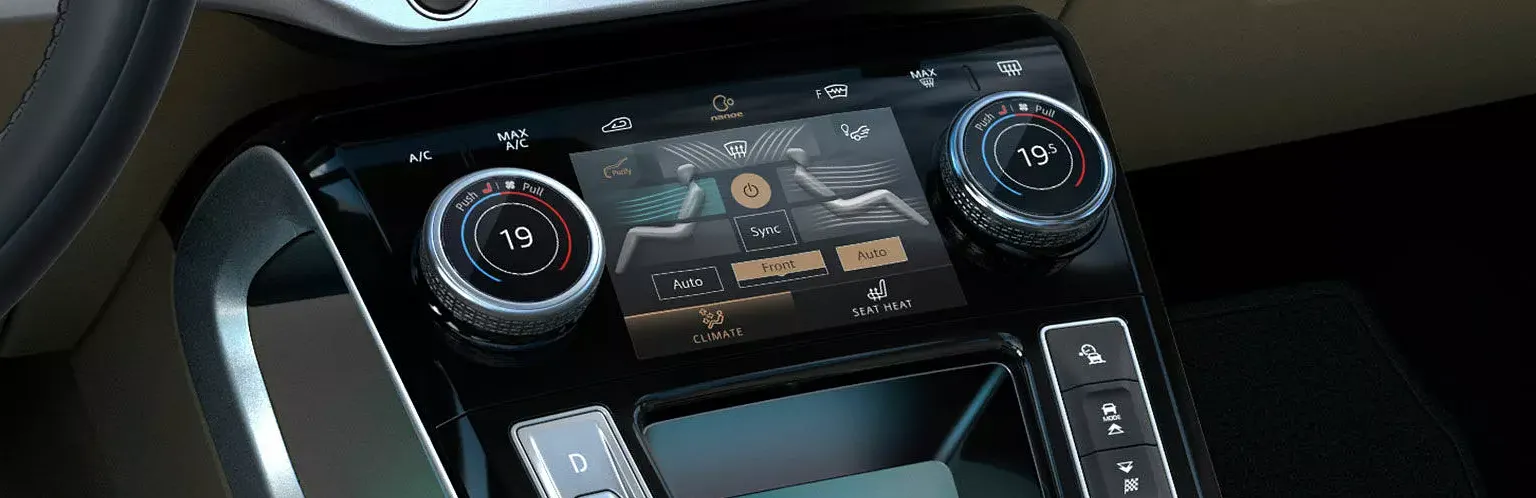
By default, the dial controls temperature. Pushing down on the dial activates the seat heating, and pulling up on the dial activates the fan speed. It’s easy to learn and operate while keeping your eyes on the road. Unfortunately, like most carmakers, Jaguar has discontinued physical climate controls in favor of touch screens.
The second carmaker is Skoda. They have an interesting concept with three ‘Smart Dials’ in current higher-end models. Each passenger has a dial to control the temperature, and by pressing down, they control the seat heating. The driver can configure the middle dial to control up to 6 different functions, such as volume, drive mode, fan speed, and air direction. It’s a simple and superb design that deserves more praise, especially considering today’s trend of touch interfaces.
In my most popular article, I explain the rise of touch screens in cars. Touch screens are a necessary evil, especially for more complicated interactions such as navigation. However, frequent, simpler interactions like climate controls should not be in a touch interface.
The often-cited reason for this is cost. However, surprisingly, it’s often the budget brands like Skoda and Renault that offer physical controls today, showing that it’s not simply a matter of cost, but of priority. Carmakers with touch-only interfaces prioritize cost and marketing over ergonomics and safety.
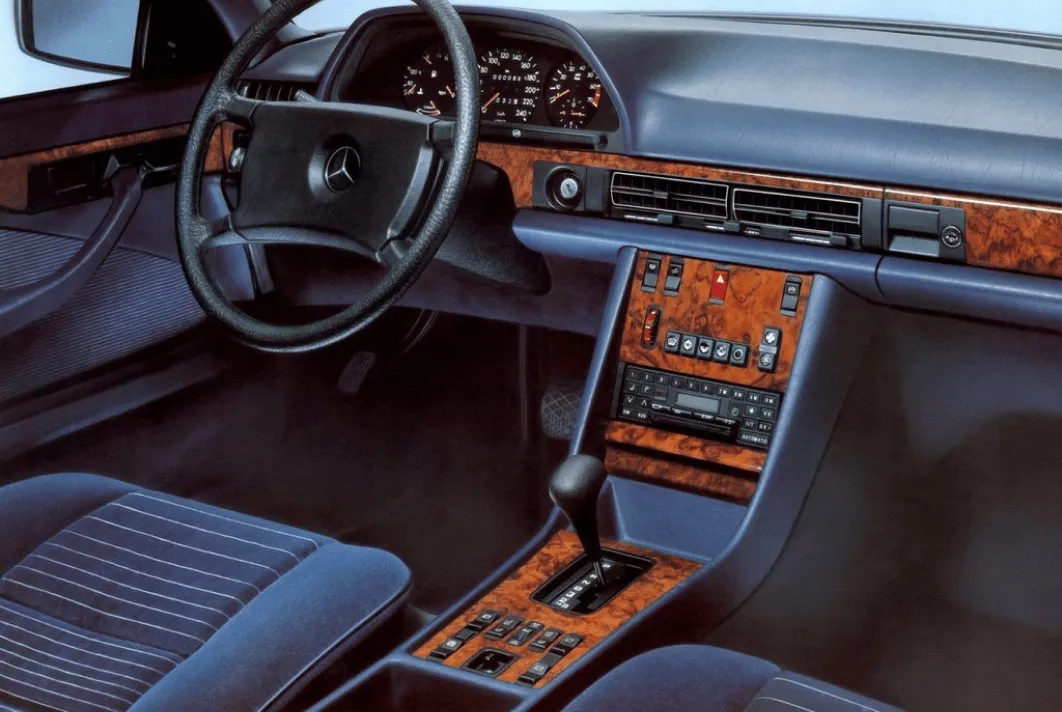
There is an inherent satisfaction and quality in operating physical controls. For years, brands like Mercedes prided themselves on spending thousands of hours perfecting the feel of their switches and buttons. The feeling of operating a physical control gives the car an inherent quality and character. This feeling is gone with touch screens and, therefore, in most modern vehicles.
I want to see more carmakers bring back physical controls and consider them a prominent part of the in-car experience. As I’ve demonstrated with this project, there is a lot to explore when designing physical controls, and I hope my project will inspire others to do the same. You can find the Seedlabs developer kit here and I have made my code public on my GitHub.
Get notified of new posts
Don't worry, I won't spam you with anything else